
TABLE OF CONTENTS
Overview
You can enjoy Dolby Atmos content from Apple TV through WiiM Bar. This guide walks you through the required setup and audio settings.
Step-by-Step Instructions
Step 1: Connect WiiM Bar and Apple TV to Your TV
Connect your WiiM Bar and Apple TV to a TV using HDMI cables. 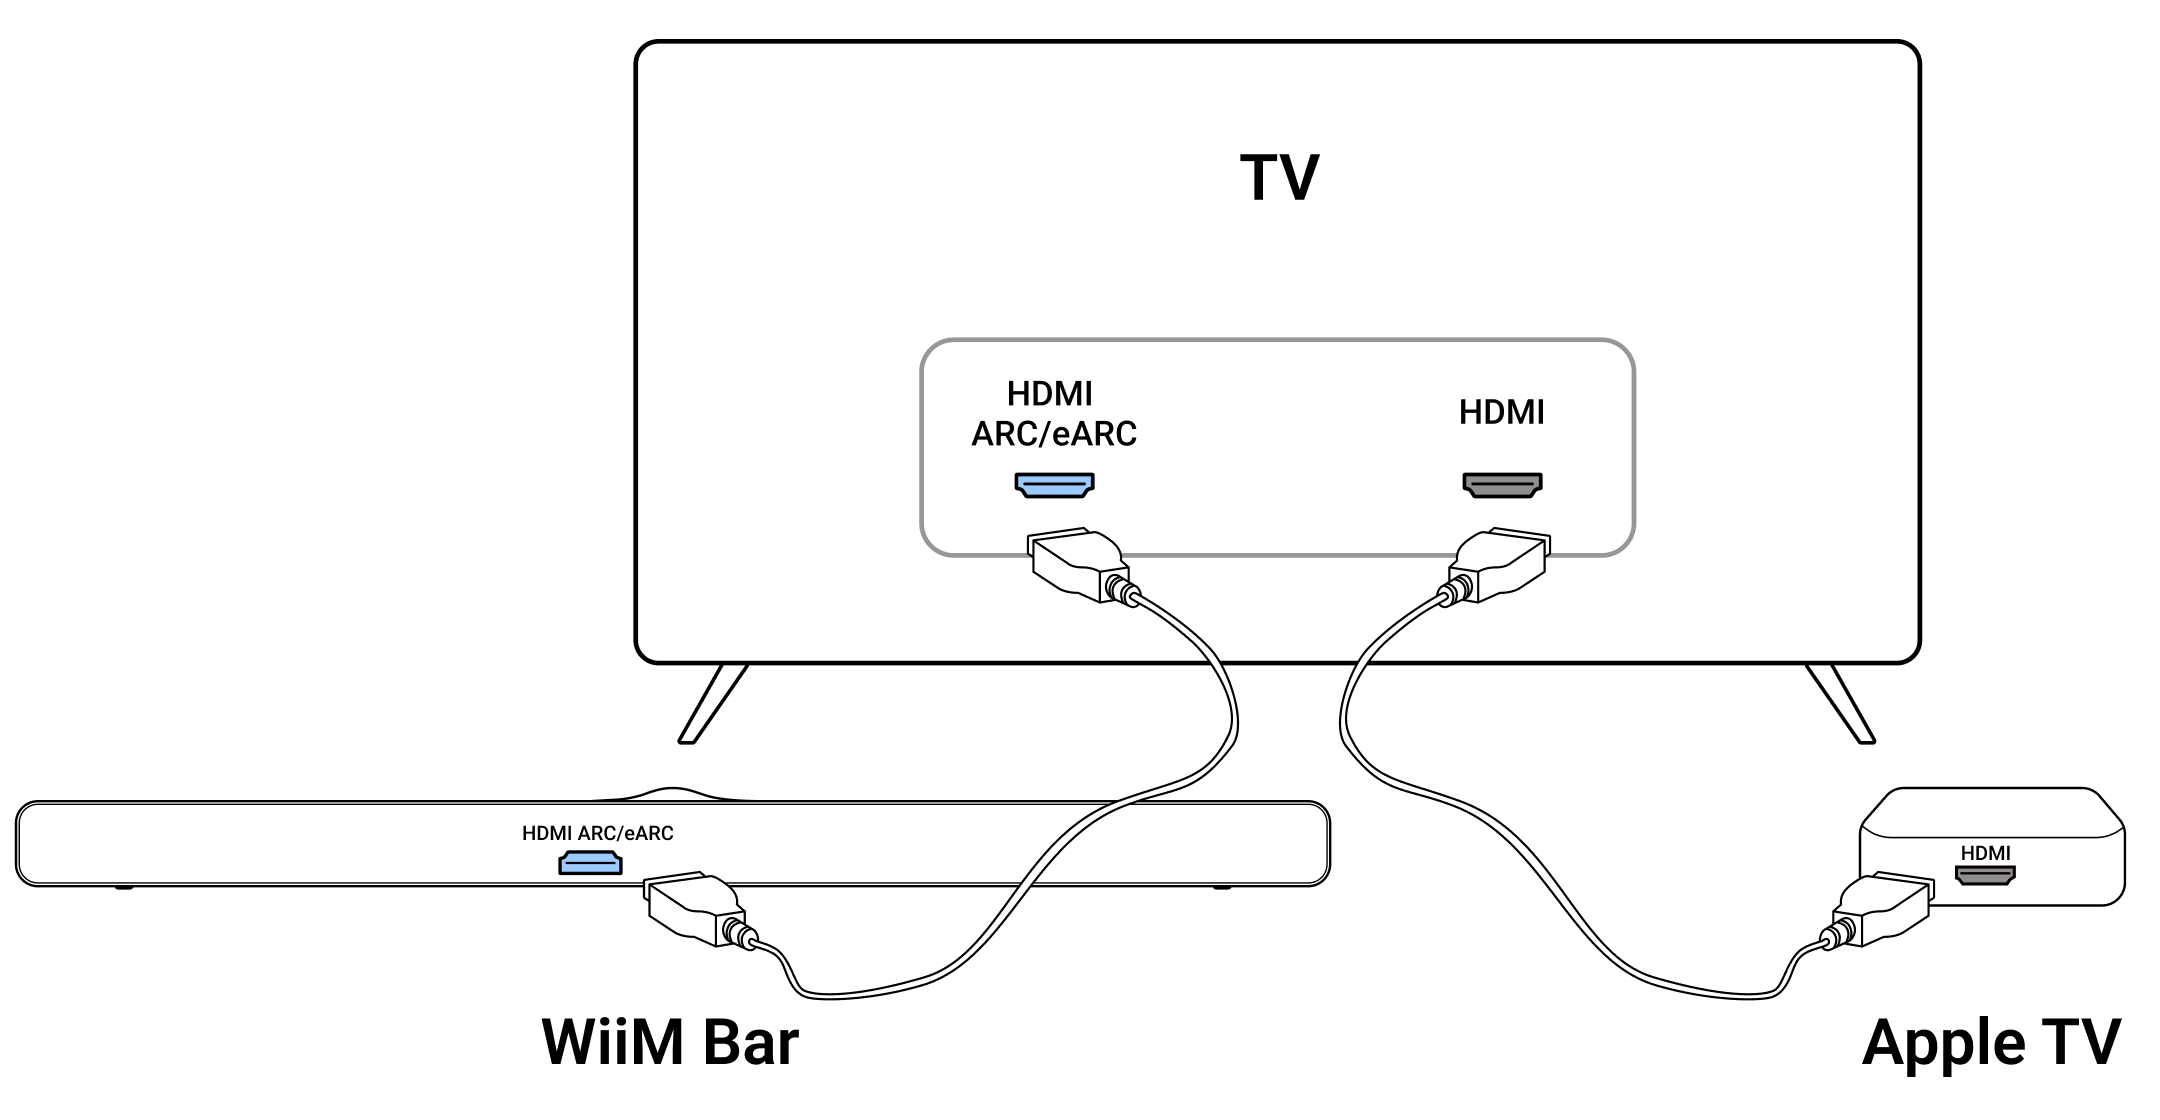
Step 2: Enable Dolby Atmos on Apple TV
- Open Settings from the Apple TV home screen.
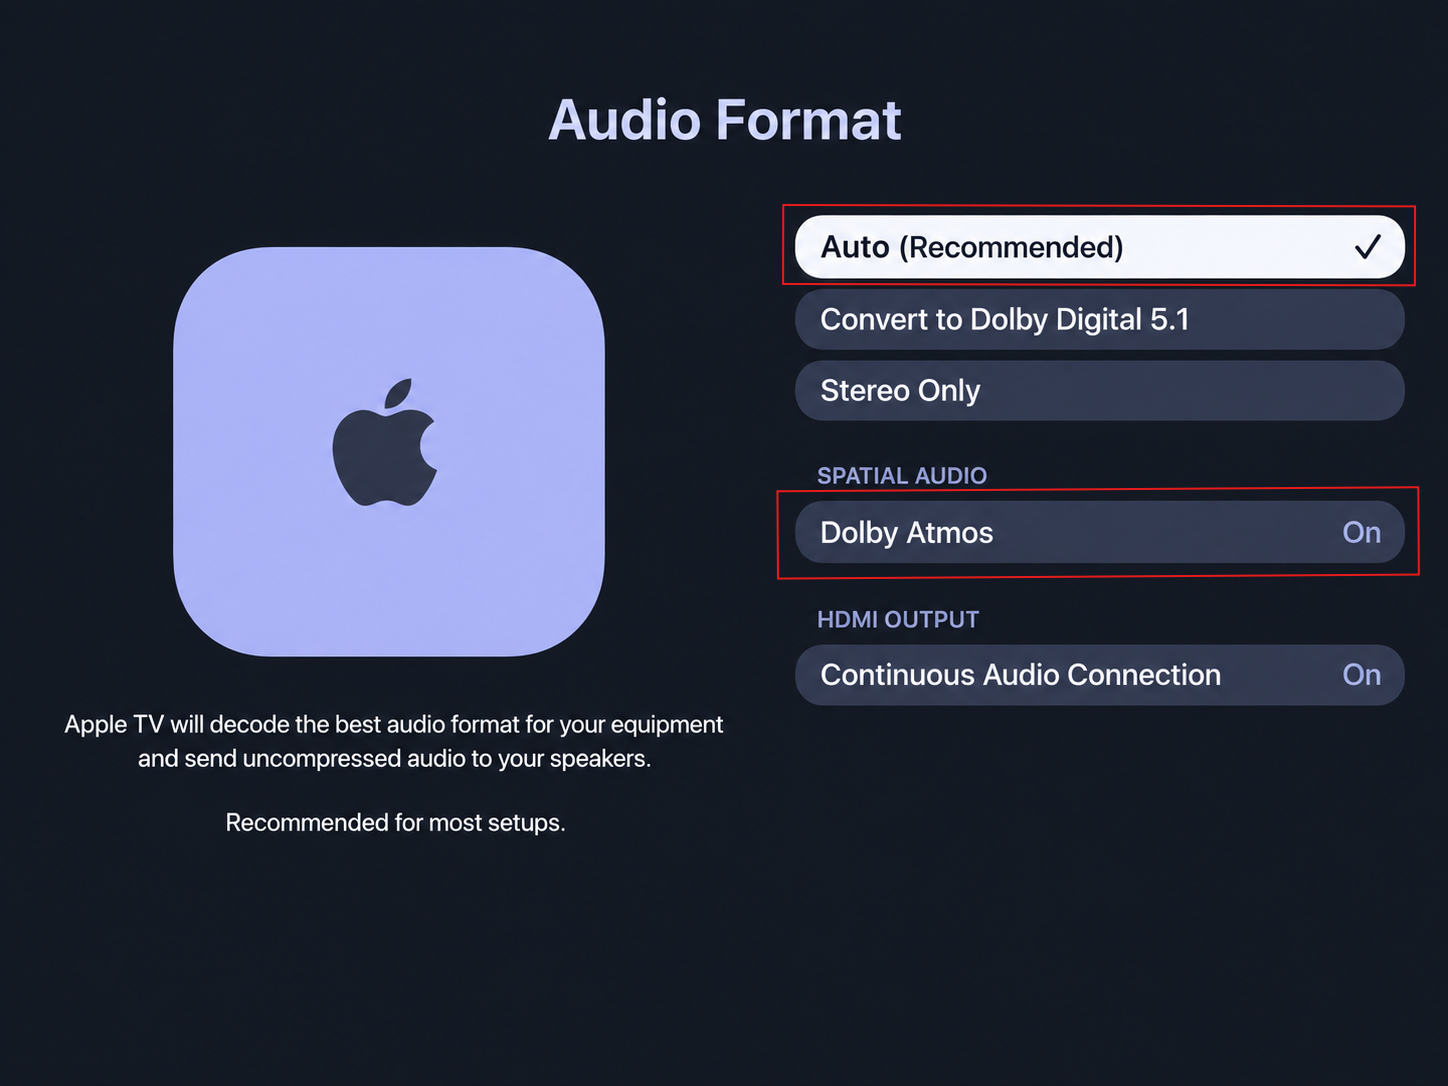
- Go to Video and Audio > Audio Format.
- Select Auto (Recommended) and set Dolby Atmos to On.
Step 3: Adjust TV Settings for Dolby Atmos Output
- Go to your TV's settings.
- Set your TV's Audio Output to your WiiM Bar.
- Enable HDMI-CEC.Note: The HDMI-CEC setting may have different names depending on the TV brand, such as AnyNet+ on Samsung TVs, Simplink on LG TVs, and BRAVIA Sync on Sony TVs.
- Set your TV's digital audio format to Auto or Pass-Through.Note: If your TV offers both options, select Pass-Through.
Step 4: Play and Enjoy
Play Dolby Atmos content on your Apple TV and enjoy the cinematic sound from your WiiM Bar. The Dolby Atmos audio format will be displayed on your WiiM Bar's built-in screen. 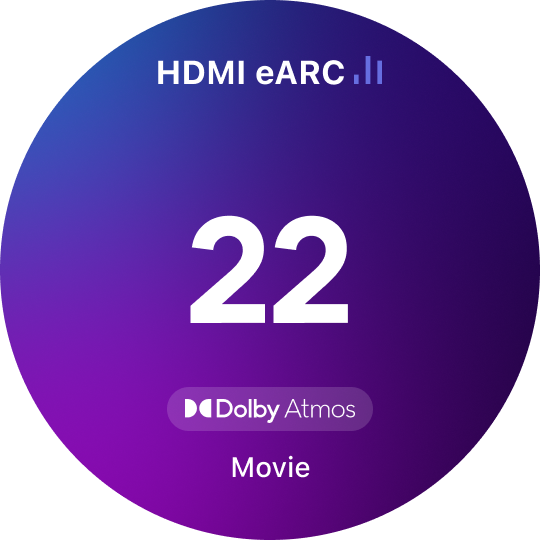
Tips
Sound Mode
The WiiM Bar offers four Sound Modes specifically for Dolby and DTS—Music, Movie, Voice, and Night. For details, see Understanding Dolby and DTS Sound Modes on Your WiiM Bar.
Simply select your preferred sound mode using the WiiM Bar Remote, WiiM Bar's built-in screen, or WiiM Home app to suit your content and listening environment.
Home Theater Expansion
You can further expand the setup up to 5.1.2 channels for a truly cinematic home theater experience.
For detailed instructions, see Expanding WiiM Bar into a Complete 5.1.2 Surround Sound System.
Troubleshooting
If you experience lip-sync delay or no sound, refer to troubleshooting instructions in How to Set Up WiiM Bar with Your TV via HDMI ARC/eARC.